

How To Recover Mac Data When Os Does Not Boot
When a Mac fails to kicking and you haven't backed up your important data, the situation could be disastrous. Perhaps you lot have irreplaceable photos, a half-written manuscript, or some other valuable data trapped in your misbehaving Mac.
If your Mac won't ability on at all, retrieving data tin can be very hard. Even so, if your Mac powers on merely simply won't boot to the Desktop, the diverse methods beneath can assist you recover your critical files.
Remove the Difficult Drive From a Mac That Won't Plough On
When a Mac won't power on at all, the data-recovery methods we'll get into beneath won't work. If you practise demand to remember data from a device with no power, consider removing the internal bulldoze and placing it in an external enclosure. External hard disk drive enclosures permit you to connect internal drives to some other figurer, commonly through USB or similar connection type.
Removing your Mac'south hard bulldoze requires some tools and technical expertise, so this solution is only suitable for those who know what they're doing. Alternatively, a adept figurer repair technician may be able to provide information recovery services, at a price.
However, if your Mac powers on merely doesn't boot up all the way, you should be able to utilise i of the methods below to recover your data for free, provided y'all've got a spare Mac or external drive to manus.
Using Apple's Share Disk—or Target Disk Mode for Intel Macs—is the simplest method for recovering data from a device that won't boot. The feature allows you to connect 2 Macs with a cable and treat ane like an external hard bulldoze that you can access and re-create files from.
To utilize Share Disk, you'll need two Macs and an appropriate cable. If the Mac that won't boot is an Apple Silicon device, you'll need to utilize Share Disk forth with a USB, USB-C, or Thunderbolt cablevision. And if the Mac is an Intel device, you'll need to use Target Deejay Manner and any of the previously mentioned cables. However, if either device is running macOS Large Sur or afterward, only a Thunderbolt connexion will work with Target Deejay Style.
Here'south how to enable Share Deejay on a Mac that won't kick:
- Connect both devices using the appropriate cable.
- Shut downward the Mac that won't boot.
- Printing and hold the Power button on information technology until the kicking manager appears.
- Click Options and Continue.
- Enter your admin countersign, if required.
- Click Utilities > Share Disk.
- Select the disk yous want to share and click First Sharing.
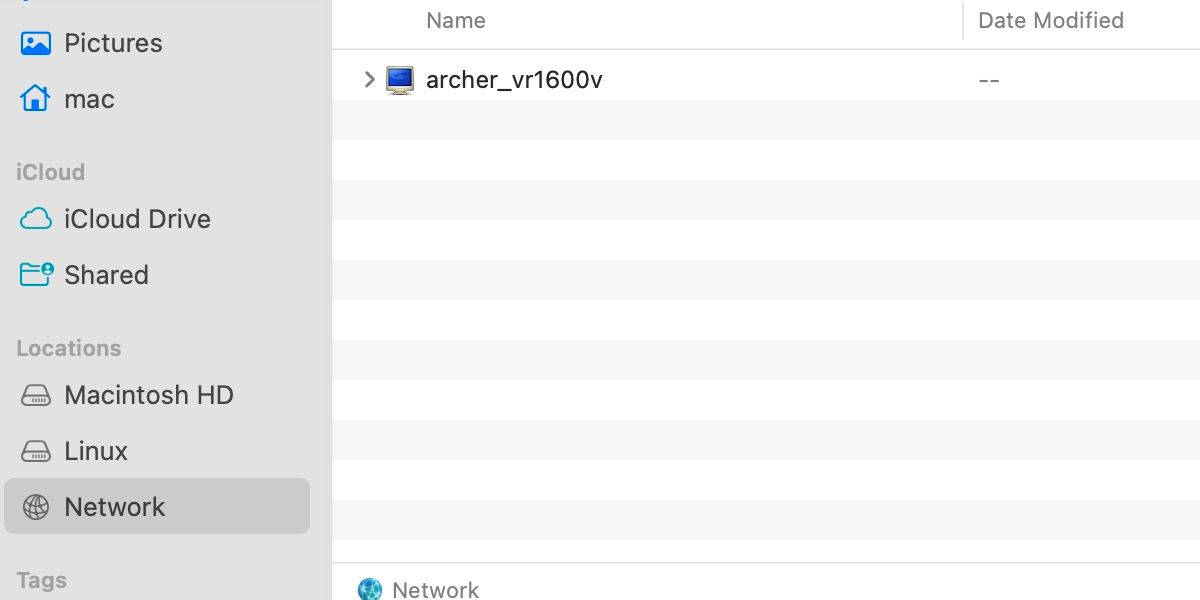
You'll need to kick the other Mac up as normal and access the shared drive as a network book from Finder.
Network should appear in your Finder sidebar. Once you locate the other Mac, double-click information technology, select Connect Equally, choose Guest when prompted, and click Connect. If all goes well, y'all should be able to copy any files across from the shared drive.
Using Target Disk Mode for an Intel Mac
Here's how to enable Target Deejay Manner on a Mac that won't boot:
- Connect both devices using the appropriate cablevision.
- Shut down the Mac that won't boot.
- Turn the Mac on and hold the T key until a deejay icon appears on-screen.
Yous tin can admission the shared drive on the other Mac from the desktop or Finder sidebar, depending on how you've prepare your Finder preferences. Dragging and dropping or copying and pasting will work to transfer any important items to the working Mac.
Option ii. Use Terminal to Re-create Files
If y'all're comfy with Terminal, you can use commands in macOS Recovery mode to re-create files across to an external hard drive. All you'll need is a correctly formatted external disk connected to your Mac.
Here's how to use Terminal to copy files from a Mac that won't boot:
- Connect the external bulldoze.
- Kicking to macOS Recovery using the method appropriate to your Mac model.
- Enter your admin password if prompted.
- Launch Disk Utility, mount your startup volume, if necessary, and close the app.
- Click Utilities > Terminal.
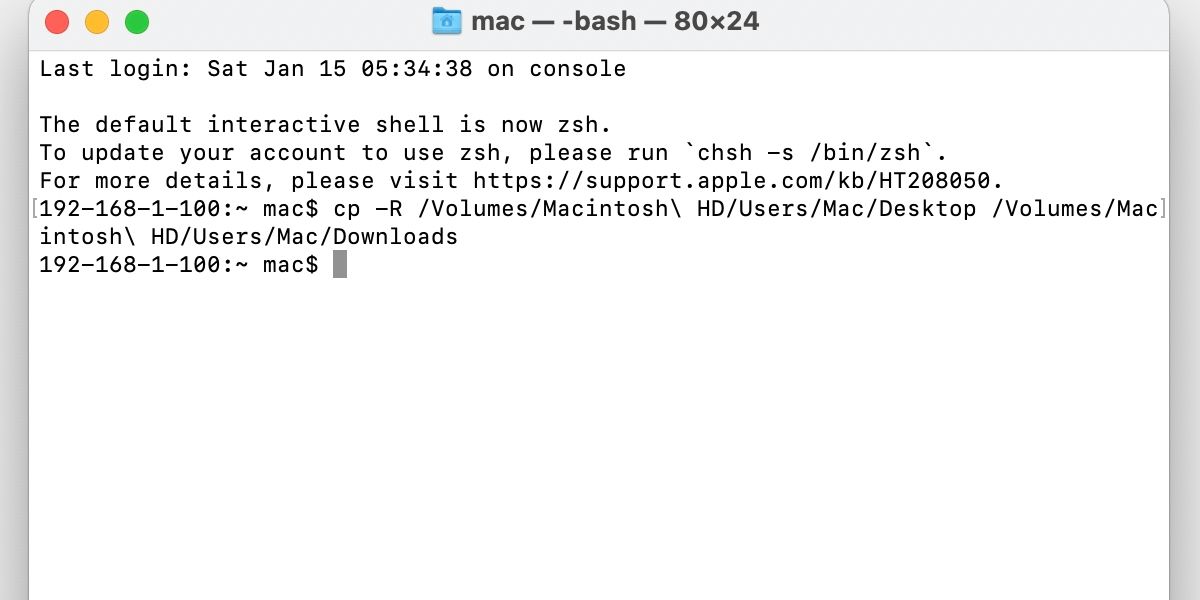
- Blazon the cp -R Terminal command beneath and press Enter to copy a specified file or binder. You'll notice that any spaces also require a backslash in the command line. For example, a consummate command includes the source and destination and looks like this:
cp -R /Volumes/Macintosh\ Hd/Users/Bob/Documents /Volumes/External\ Drive/
- To view the contents of a folder at whatever time, you can apply the ls control beneath. For example, a consummate control line will look like this:
ls /Volumes/Macintosh\ HD/Users/Bob/Documents
Using Final isn't the prettiest style to recovery data, but it certainly is effective in one case you familiarize yourself with the appropriate commands.
Option 3. Install macOS on an External Drive to Copy Files
If Last is a piddling daunting and you don't accept access to another Mac, yous tin install the macOS onto an external hard drive, boot it up, and re-create files across. The process can be fourth dimension consuming, because you'll need to await for macOS to download and install, but information technology is an effective data-recovery pick.
Here's how to install macOS on an external hard drive from macOS Recovery:
- Connect the external bulldoze.
- Boot to macOS Recovery using the method appropriate to your Mac model.
- Enter your admin password, if prompted.
- Launch Disk Utility.
- Erase your external drive using GUID Partition Map and choose an advisable format, either APFS or Mac OS Extended (Journaled) for macOS 10.12 or earlier.
- Close Deejay Utility, choose Reinstall macOS, and follow the prompts, ensuring that yous select your external drive as the destination.
One time the installation completes, you can complete the setup and re-create files from your Mac to your new external OS. If the internal drive doesn't appear automatically in Finder, you lot may need to mount and unlock it using Deejay Utility.
Backup Options in macOS
The best way to avoid information loss from a Mac non booting is to always back up. Several backup methods exist for macOS, then you can choose the flavor that best suits your needs. Options include:
- Time Machine
- iCloud
- 3rd-political party backup software
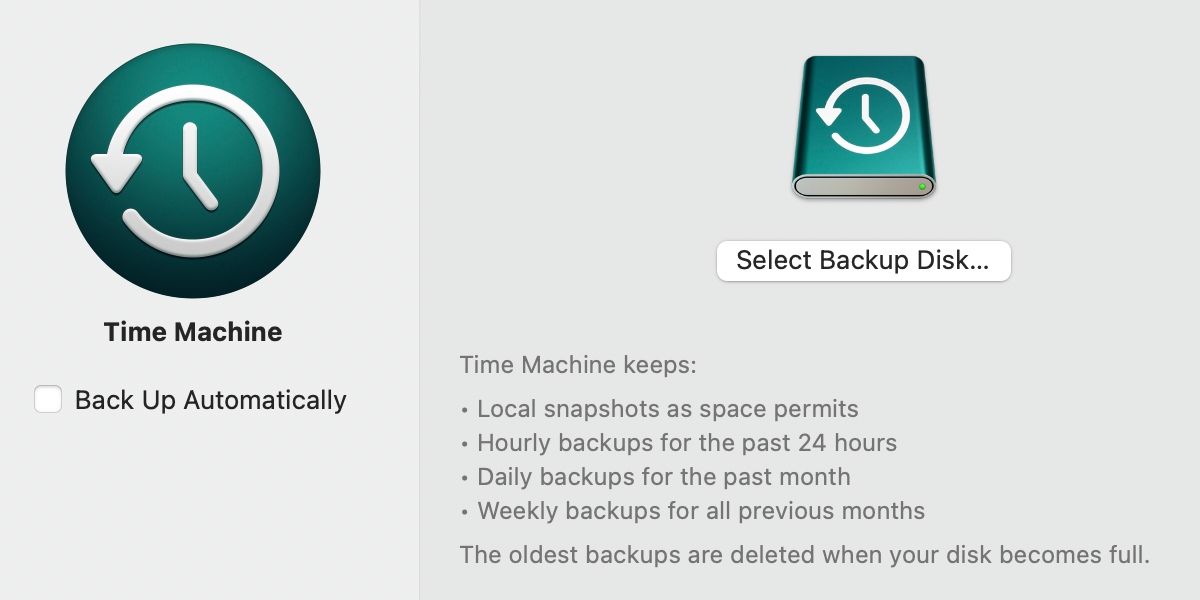
Whatever method yous select, you should ensure that backups are consistent, complete, and easy to admission when you need them.
Avoid Data Loss in macOS
A misbehaving Mac that refuses to boot doesn't automatically result in data loss. With the right method, you can usually recover nearly information before you lot reformat or repair your device to become it functioning again.
However, performing regular backups is the best fashion to avoid always losing important items. If you don't currently back up your data, now's a skillful fourth dimension to start.

How To Recover Mac Data When Os Does Not Boot,
Source: https://www.makeuseof.com/how-to-recover-data-from-a-mac-that-wont-boot/
Posted by: alexanderdeent1936.blogspot.com
0 Response to "How To Recover Mac Data When Os Does Not Boot"
Post a Comment